Copying Evidence Across Portals in Your VIDIZMO Account
If you need to copy evidence within your portal or to another portal within the same account to share it with a specific group of people, you can easily do so by selecting the desired location. A dropdown menu is now available to select specific metadata you wish to copy with the evidence, allowing you to selectively copy relevant information along with the evidence. Additionally, as a member, you now have the ability to copy evidence to a hidden portal.
Note:
- You cannot delete evidence during the copy process.
- Publish and View Settings of the destination Portal are applied on the copied evidence.
- You can also copy Single/Bulk Folder in the EVCM product package in a similar way.
Roles & Permissions
- Ensure that you belong to a group where the Partner App permission is enabled to access this feature.
Steps to Copy Evidence
Step I
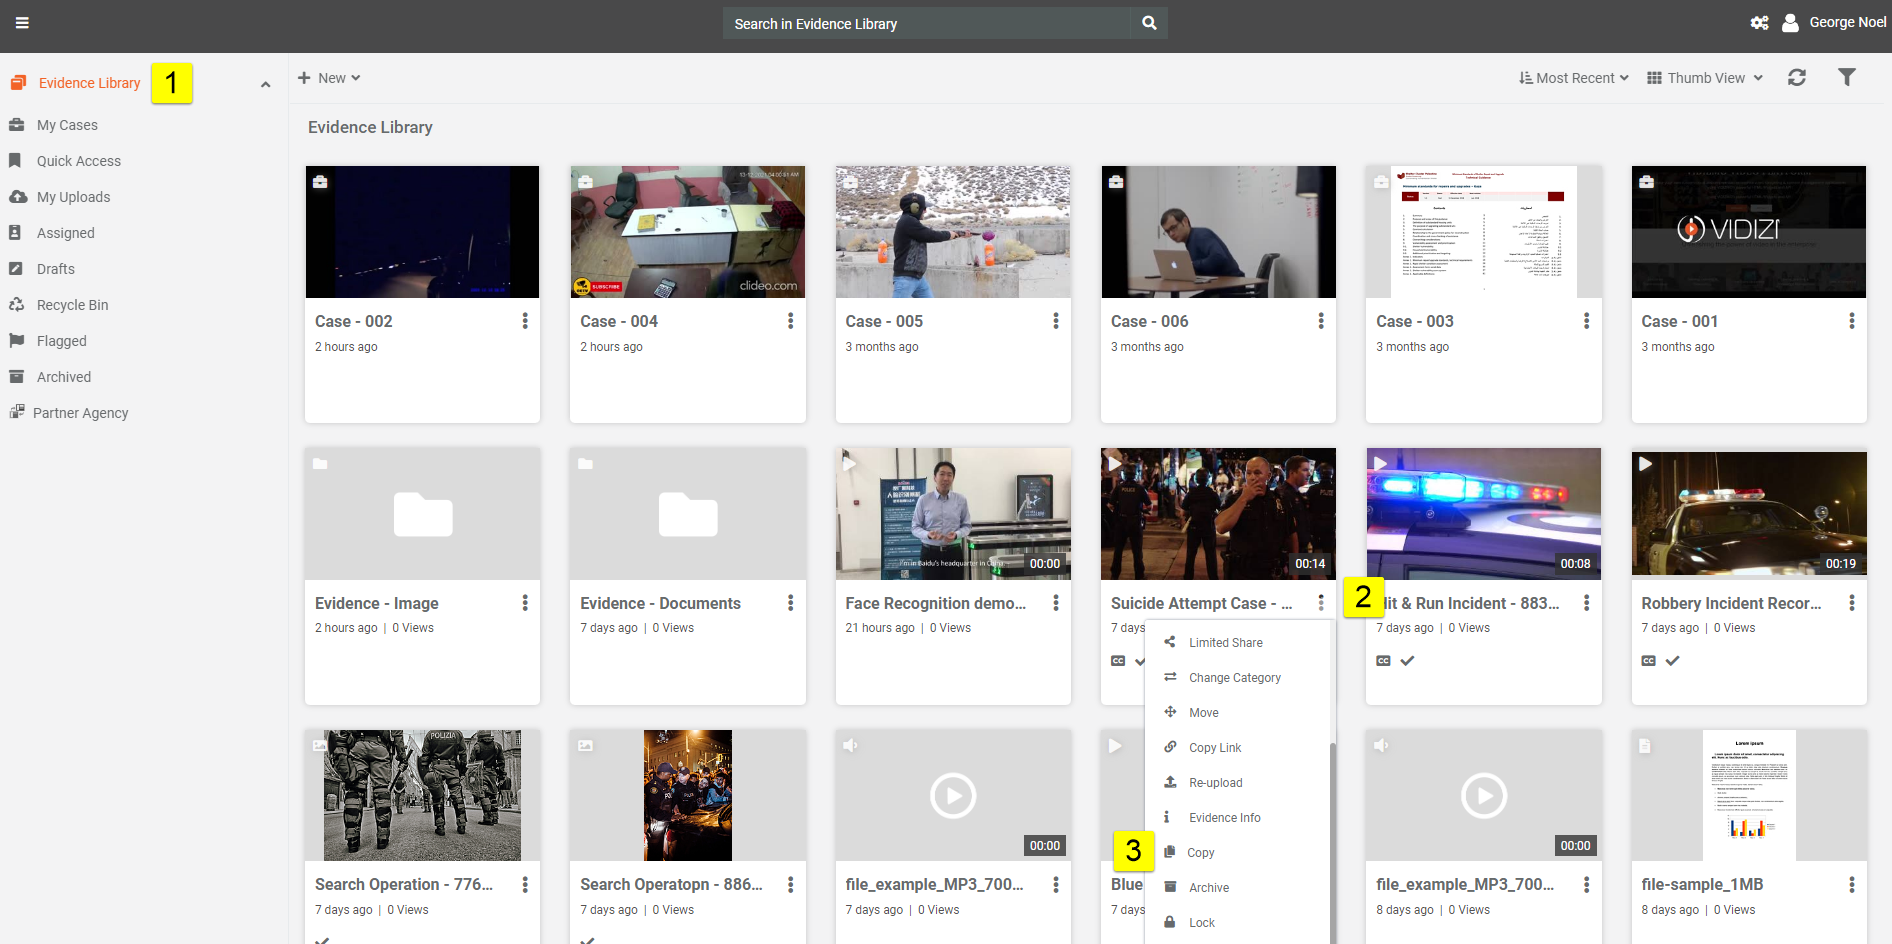
- Go to Evidence Library.
- Choose the video you want to copy and click on the overflow menu next to the video.
- Select Copy from the overflow menu.
Step II
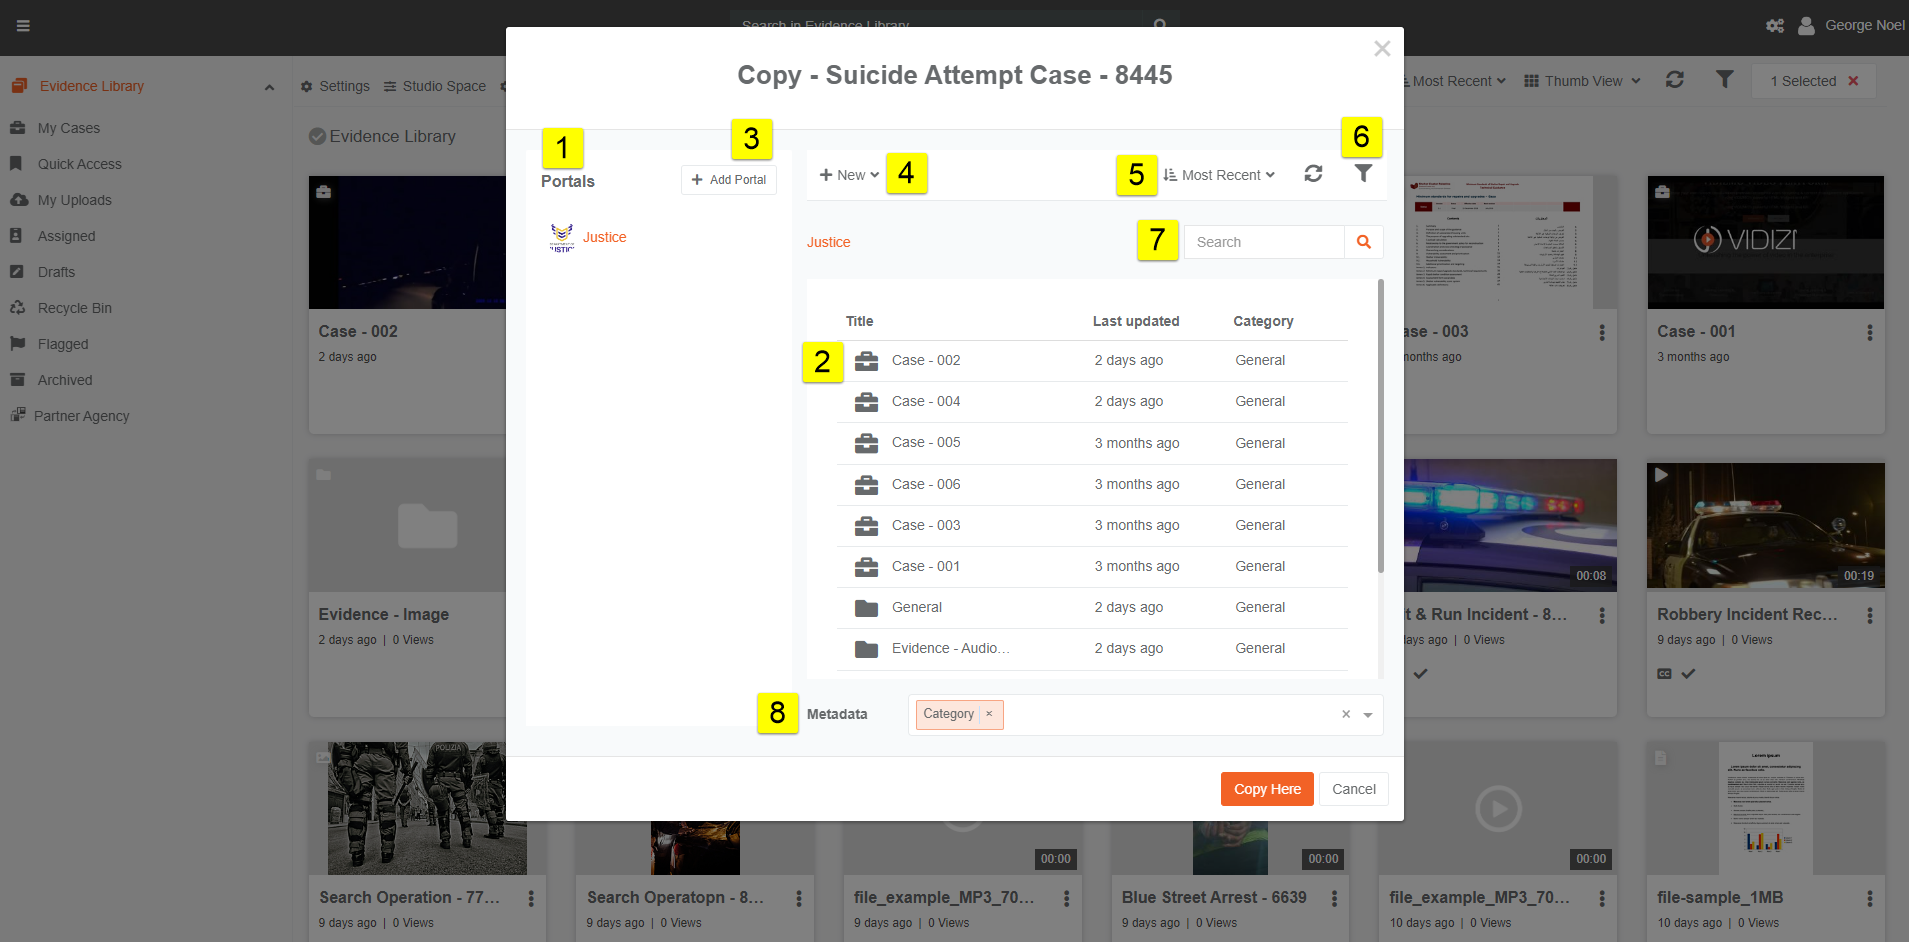
Once you click on copy, a copy modal will open.
-
List of all the account portals that the user has editing rights for:
- Easily access a list of all account portals with editing rights to locate the source of the content and verify permissions.
-
List of cases and folders within the selected portal:
- Quickly locate the content by navigating through different cases and folders.
-
Button to add hidden account portals with editing rights:
- Use the "Add Portal" button to reveal and access content from hidden account portals.
-
Ability to create new cases or folders:
- Create new cases or folders to store copied content for better organization.
-
Sorting functionality:
- Use sorting by Title or Most Recent to organize large volumes of copied content.
-
Search function to find relevant folders and cases:
- Locate specific content quickly using the search function.
-
Filter function to sort cases and folders based on categories, status, format, and author:
- Organize content by filtering based on categories, status, or other attributes.
-
Dropdown menu to select metadata:
- Choose specific metadata (keywords, tags, descriptions) from a predefined list to include with the copied content.
Step III
Metadata Dropdown
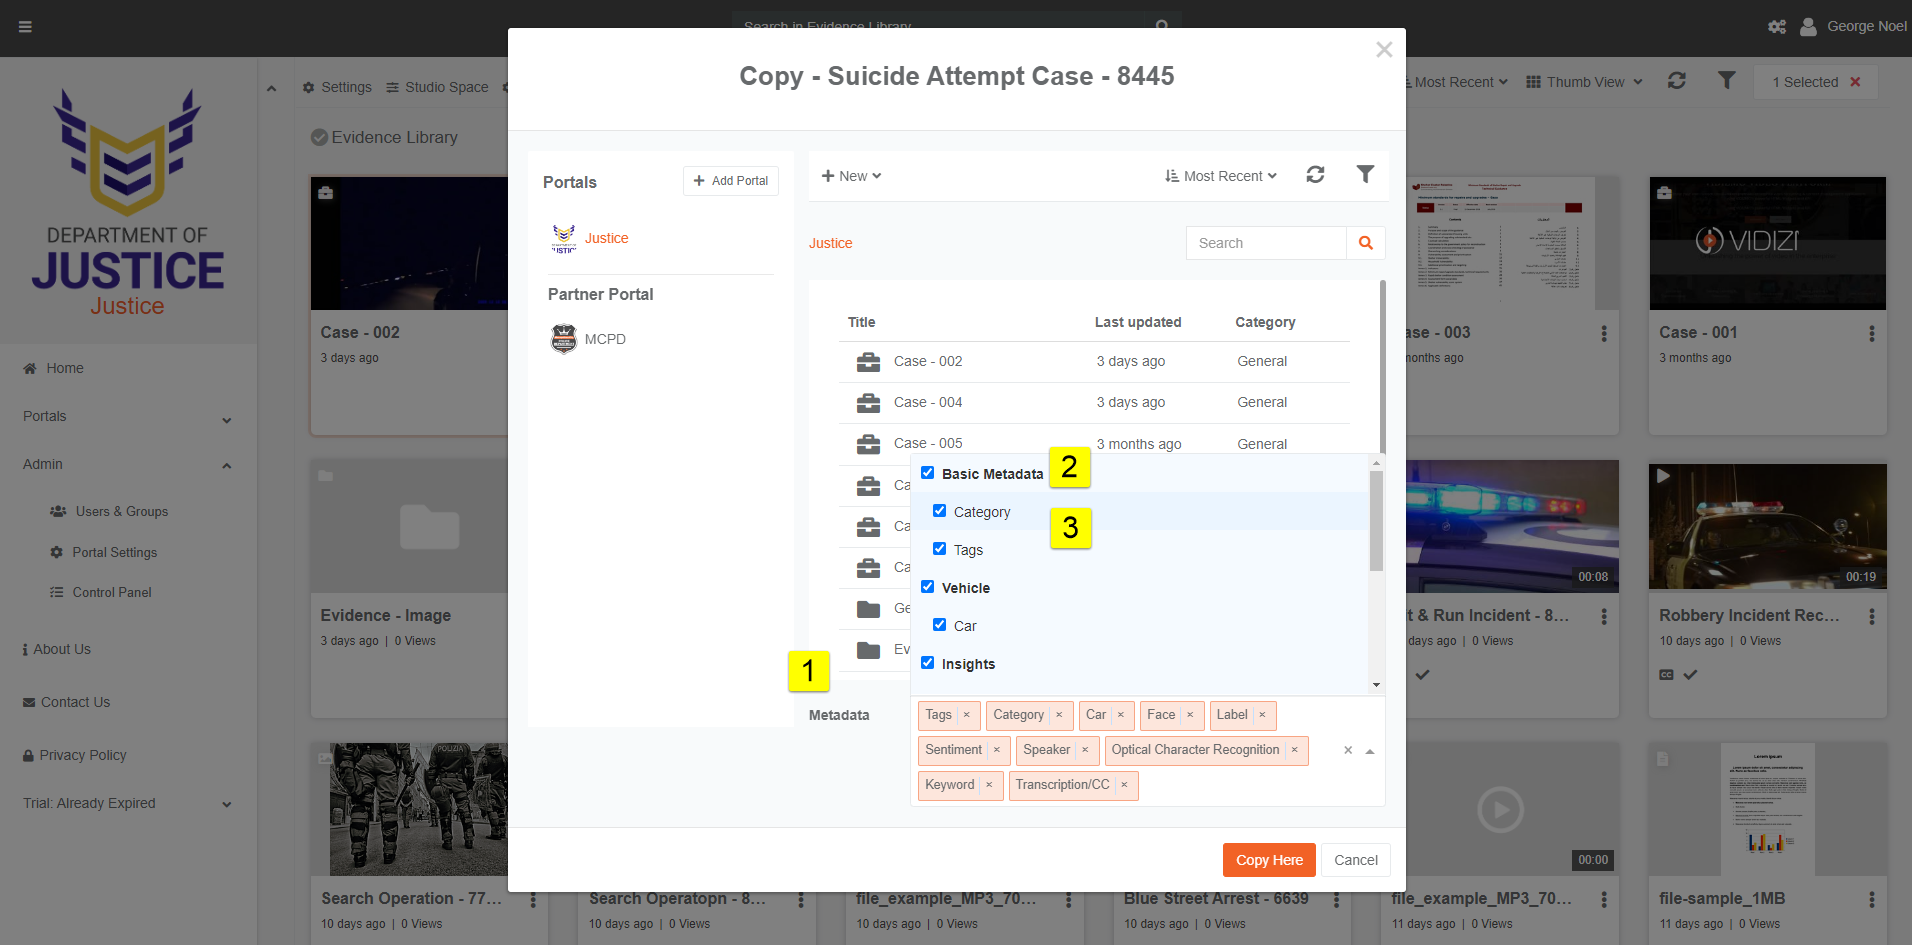
- Select the desired metadata to copy along with the evidence or folder.
- Click on the dropdown.
- To select all metadata within a group, check Select All. To select specific items, check each individually.
- By default, only Basic Metadata is selected, but you can modify this selection.
List of Metadata That Can Be Copied:
- Insights: OCR, Transcription, Face, Brand, Emotion, Sentiment, Label, Topic, Keyword, Speaker, Annotation, Object, Person, Language
- Interactivity: Handout
- Weapon: Gun, Knife
- Vehicle: Car, Bike, Bus, License Plate, Truck
- Basic Metadata (Selected by Default): Custom Attributes, Tags, Description, Category
- Location: Drone
- Redacted Audio: Audio Segment
- Plugin: HubSpot, Text Overlays
- Comment: Notes
Note: When selecting single or bulk mashups, only metadata in the selected mashups will appear in the dropdown. For folders, all potential metadata for the folder and its contents are displayed.
Step IV
Copy Evidence to a Hidden Portal
- You can copy evidence and folders to hidden Portals where you have user and copy rights.
- Click Add Portal.
- Enter the URL of the portal and click Add Portal.
- The portal will be added, allowing you to copy content to it.
- You can also select metadata from the dropdown.
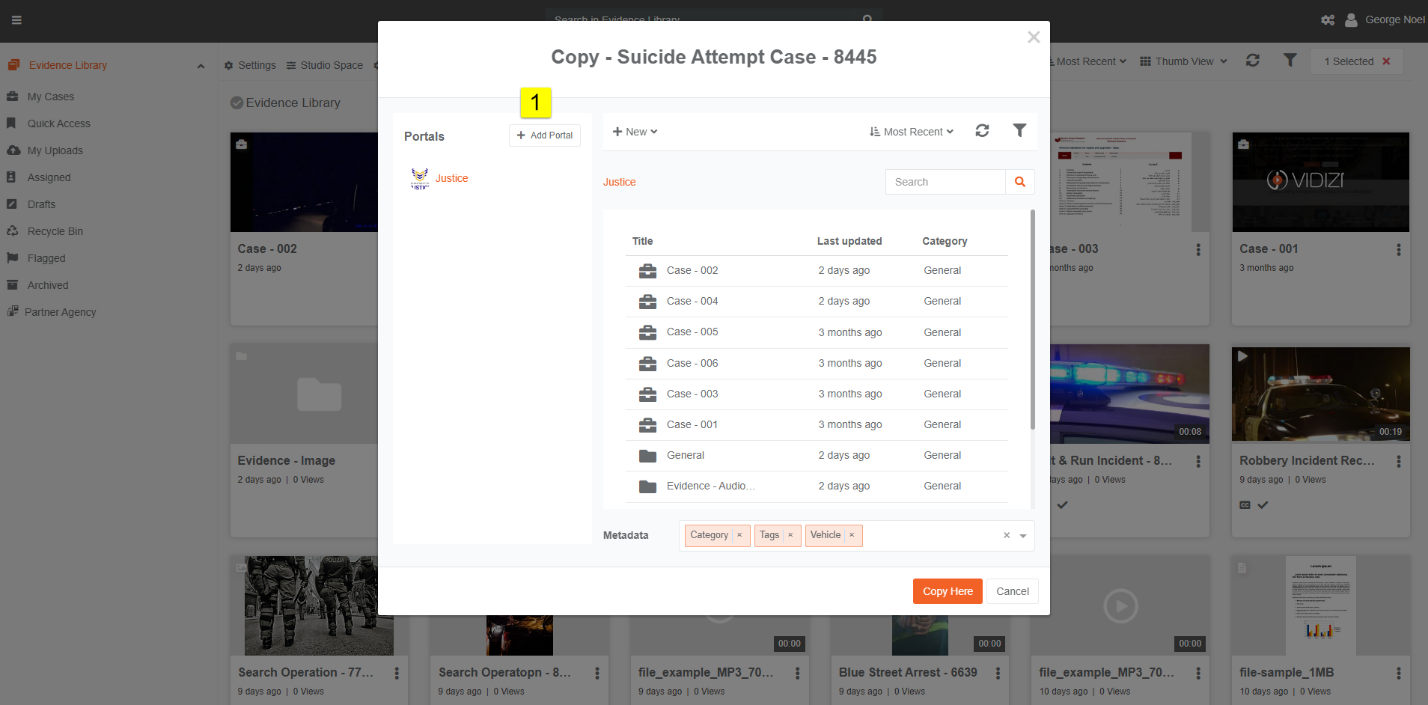
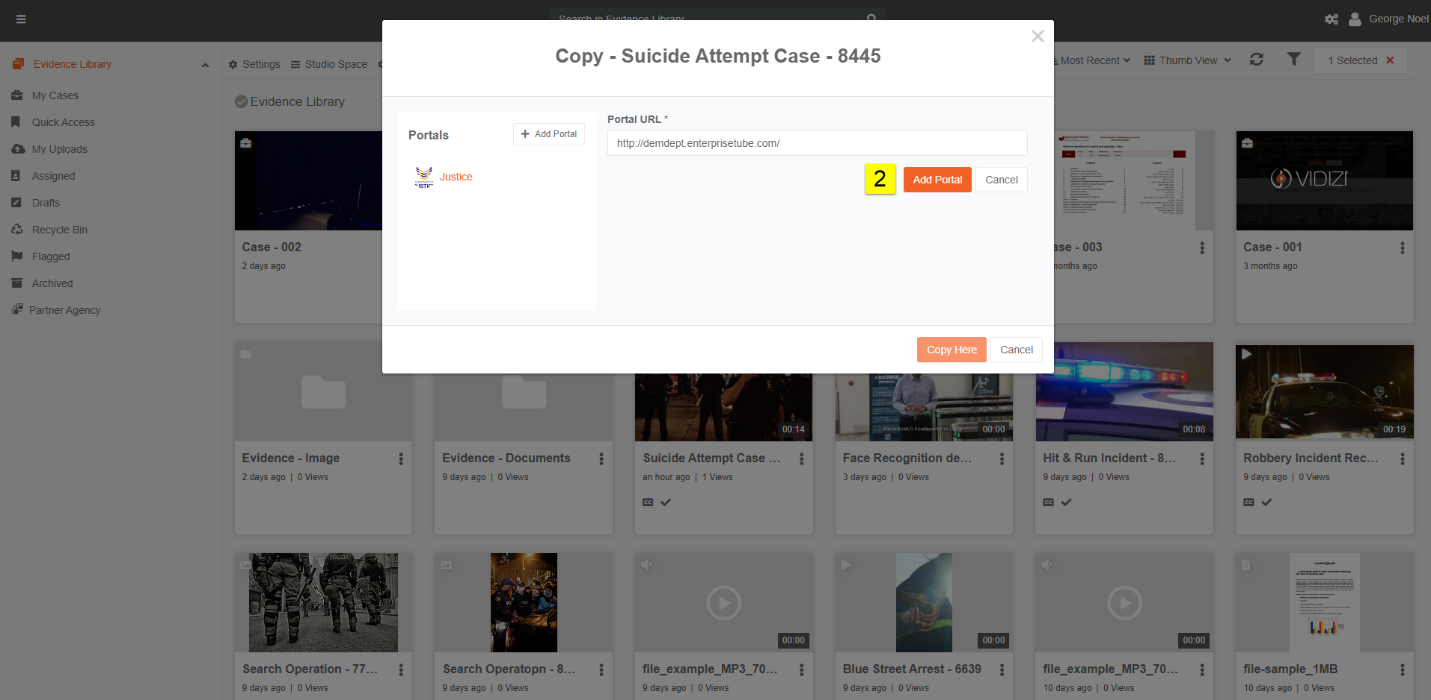
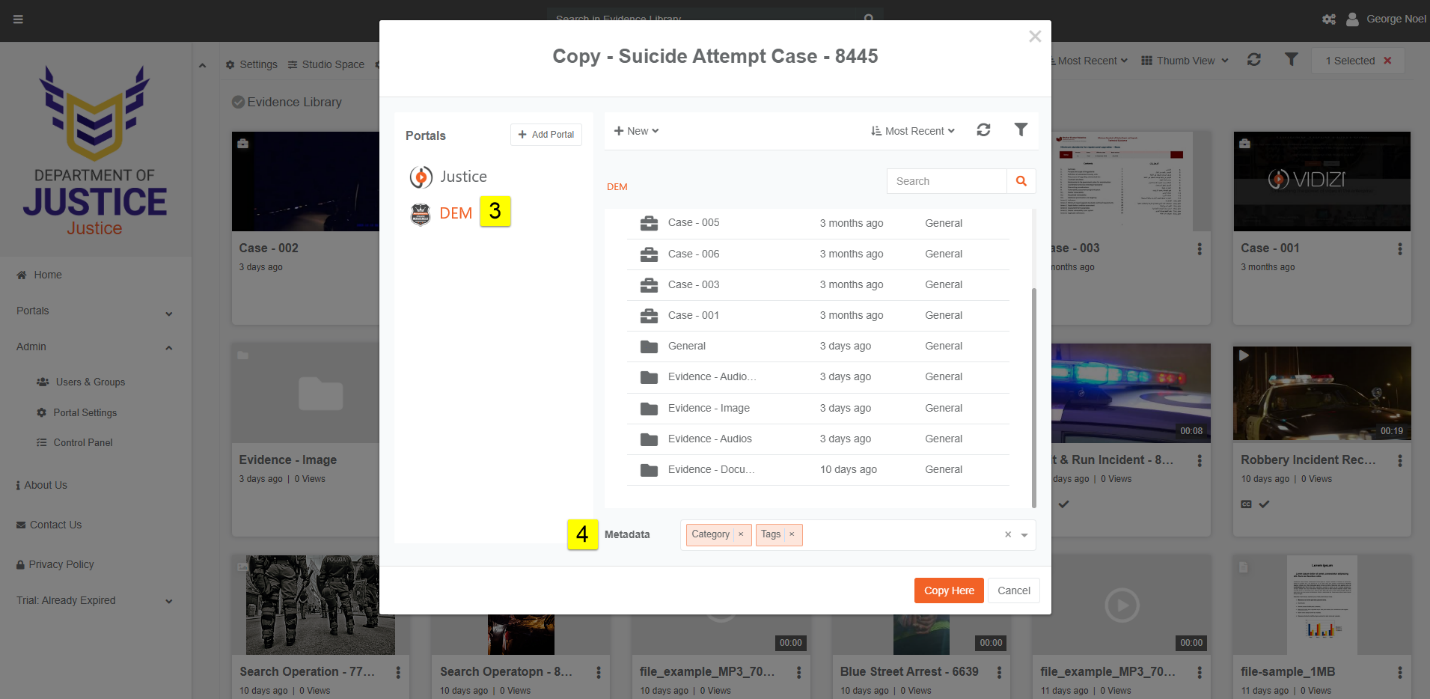
Note: The portal will only be added if the URL is valid, you are a member, and you are part of content manager group in the hidden portal.
Step V
Copy Evidence to Another Portal within the Same Account
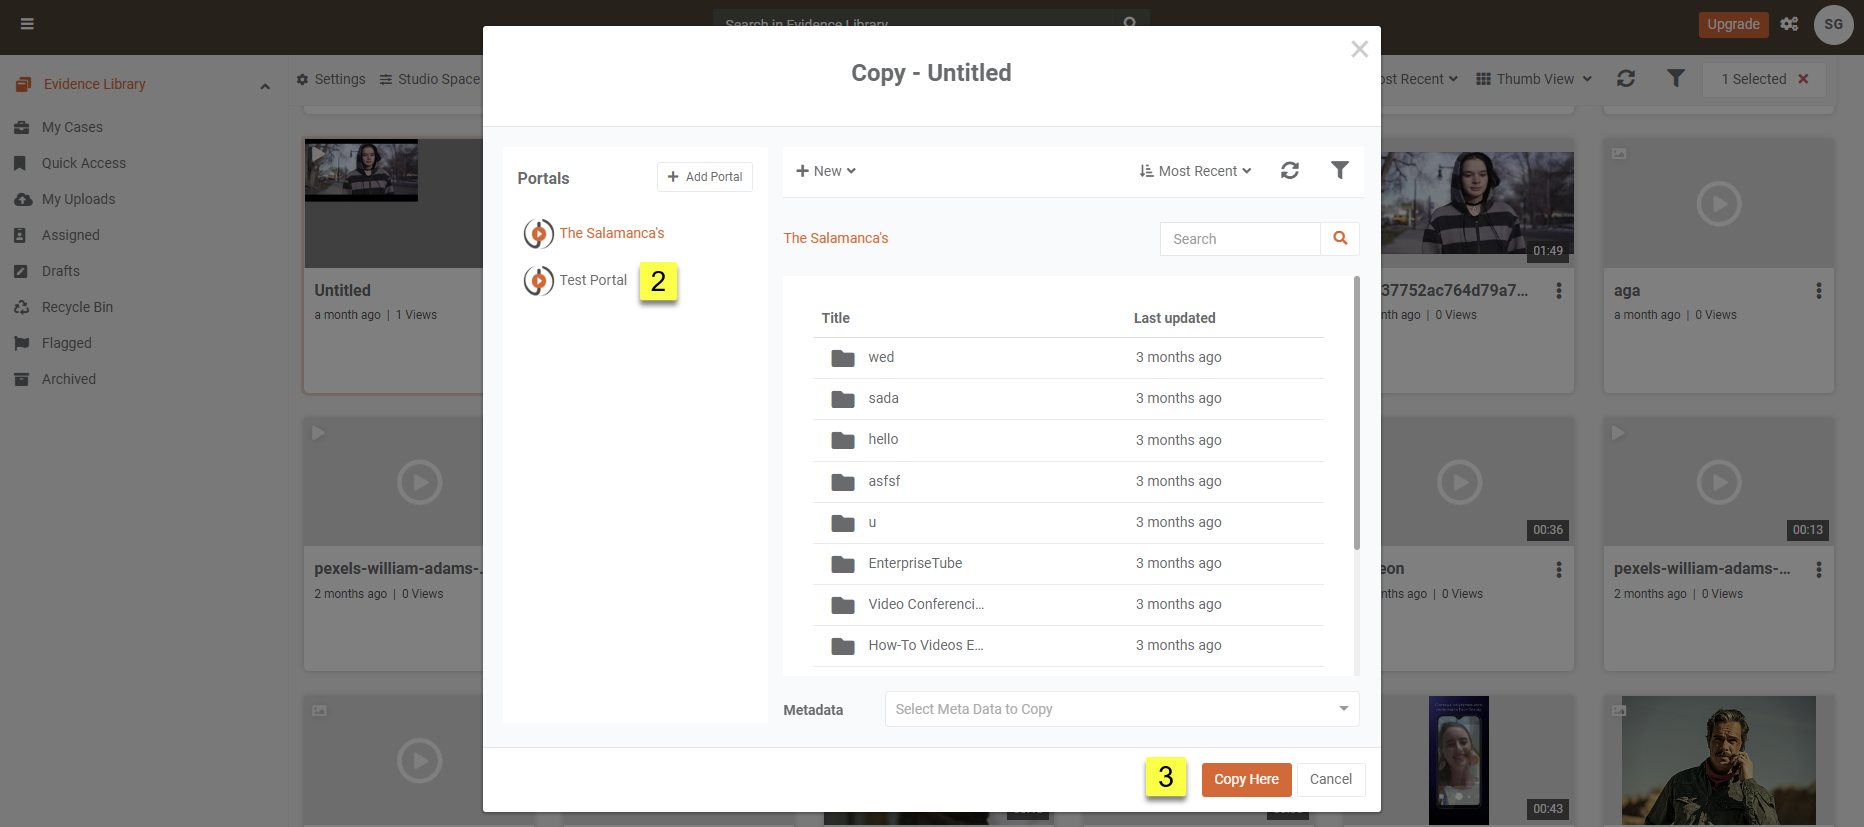
- Select the video or folder, click on the overflow menu, and choose Copy.
- Select the target portal from the available portals list. If not listed, follow the "Copy Evidence to a Hidden Portal" steps.
- Click Copy Here to begin copying.
- The evidence or folder, including videos and folders, will be copied to the selected portal.
Step VI
Copy to a Partner Agency’s Portal
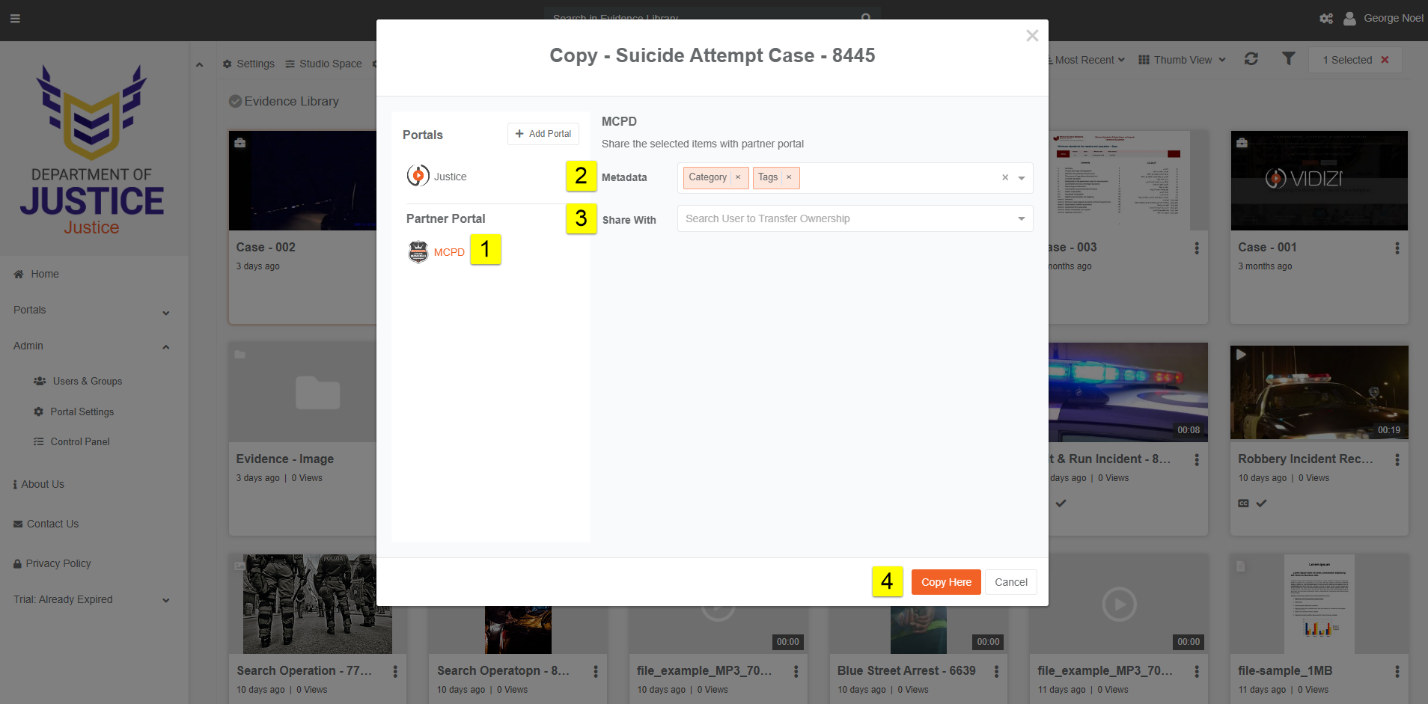
You can share evidence with a Partner Agency after configuring the Partner App.
- Select the metadata.
- Choose the user who will own the evidence.
- Click Copy Here.
View Evidence in Your Partner Agency
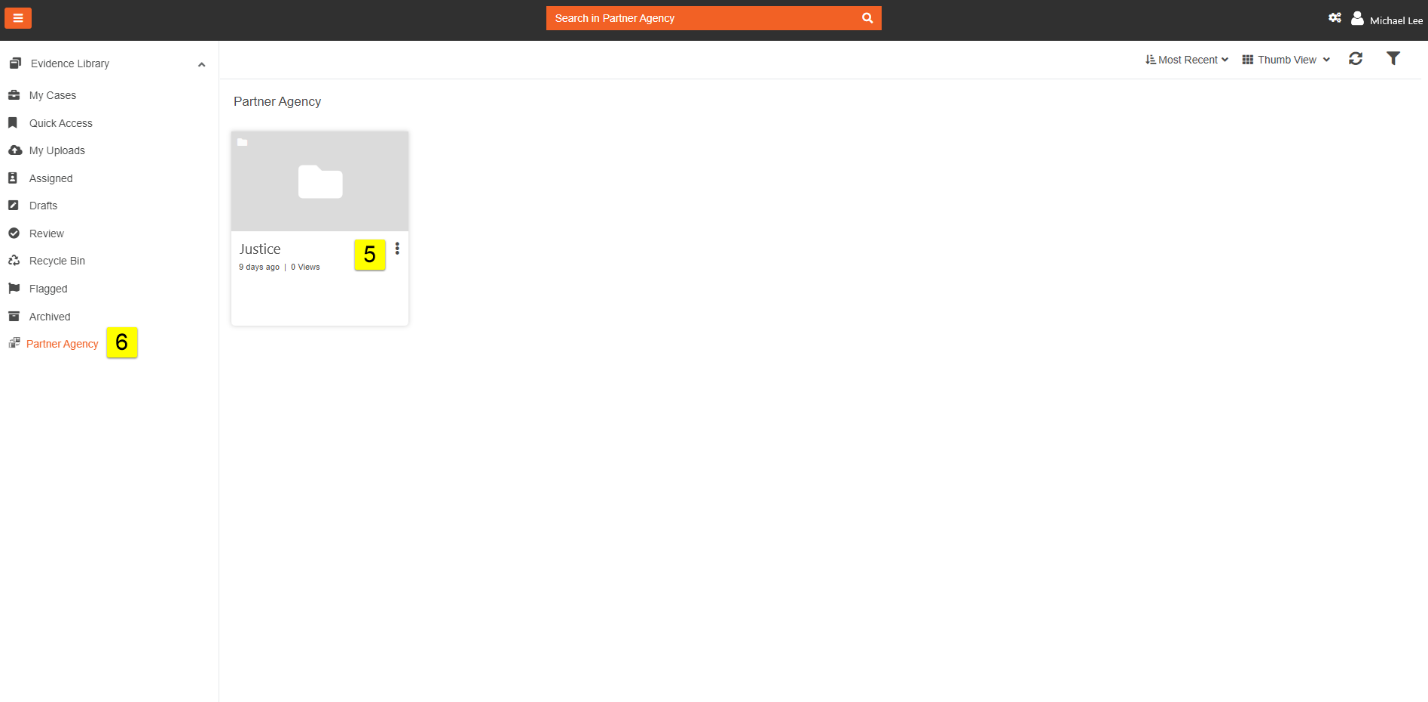
- A new folder named after your portal will be created in your Partner's Portal with the copied evidence.
- View evidence shared with your Partner Agency in the Partner Agency section as well as Evidence Library.
Step VII
Anonymize Notes When Copying to Partner Agency
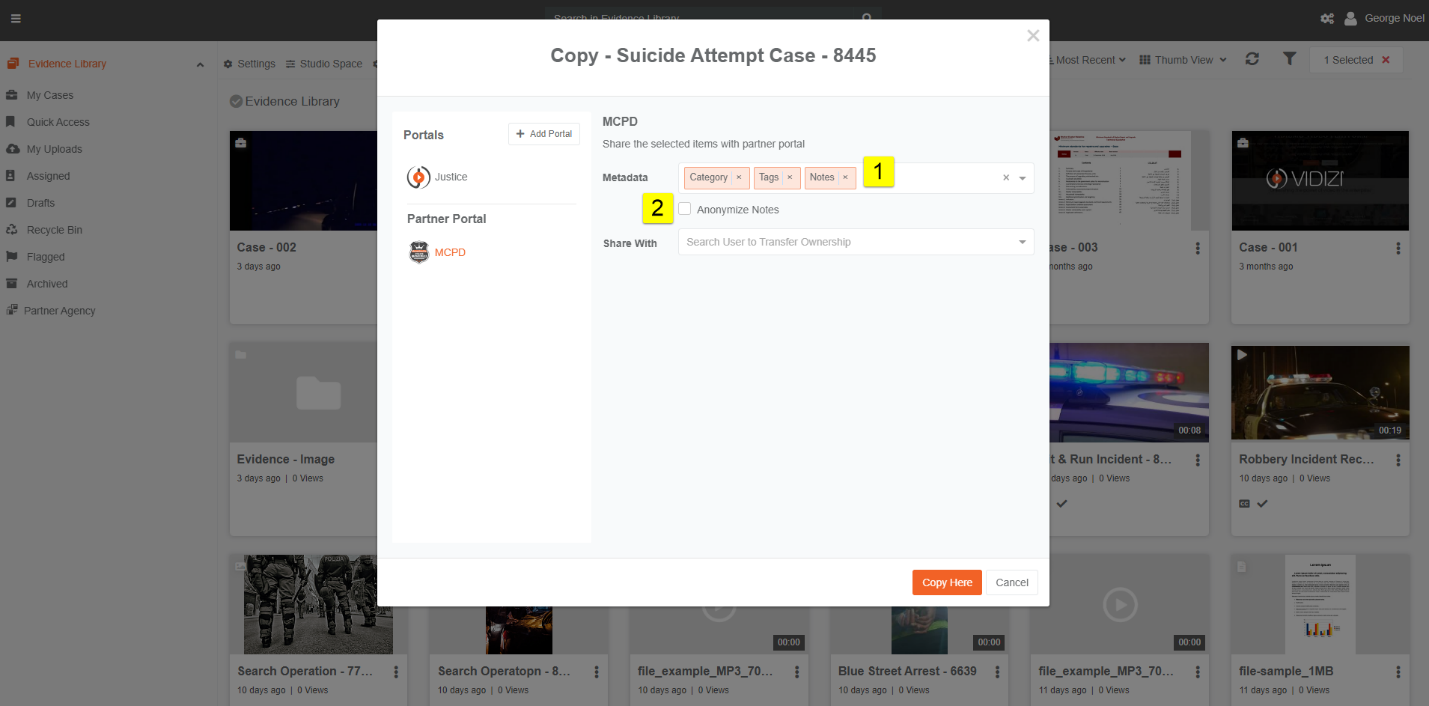
- Select Notes from the metadata dropdown.
- A checkbox will appear to Anonymize Notes, hiding the note-taker's identity.
Note: Partner App Feature is only available in the DEM product package.
Result
Once the video copy process is complete, an email will confirm the completion.
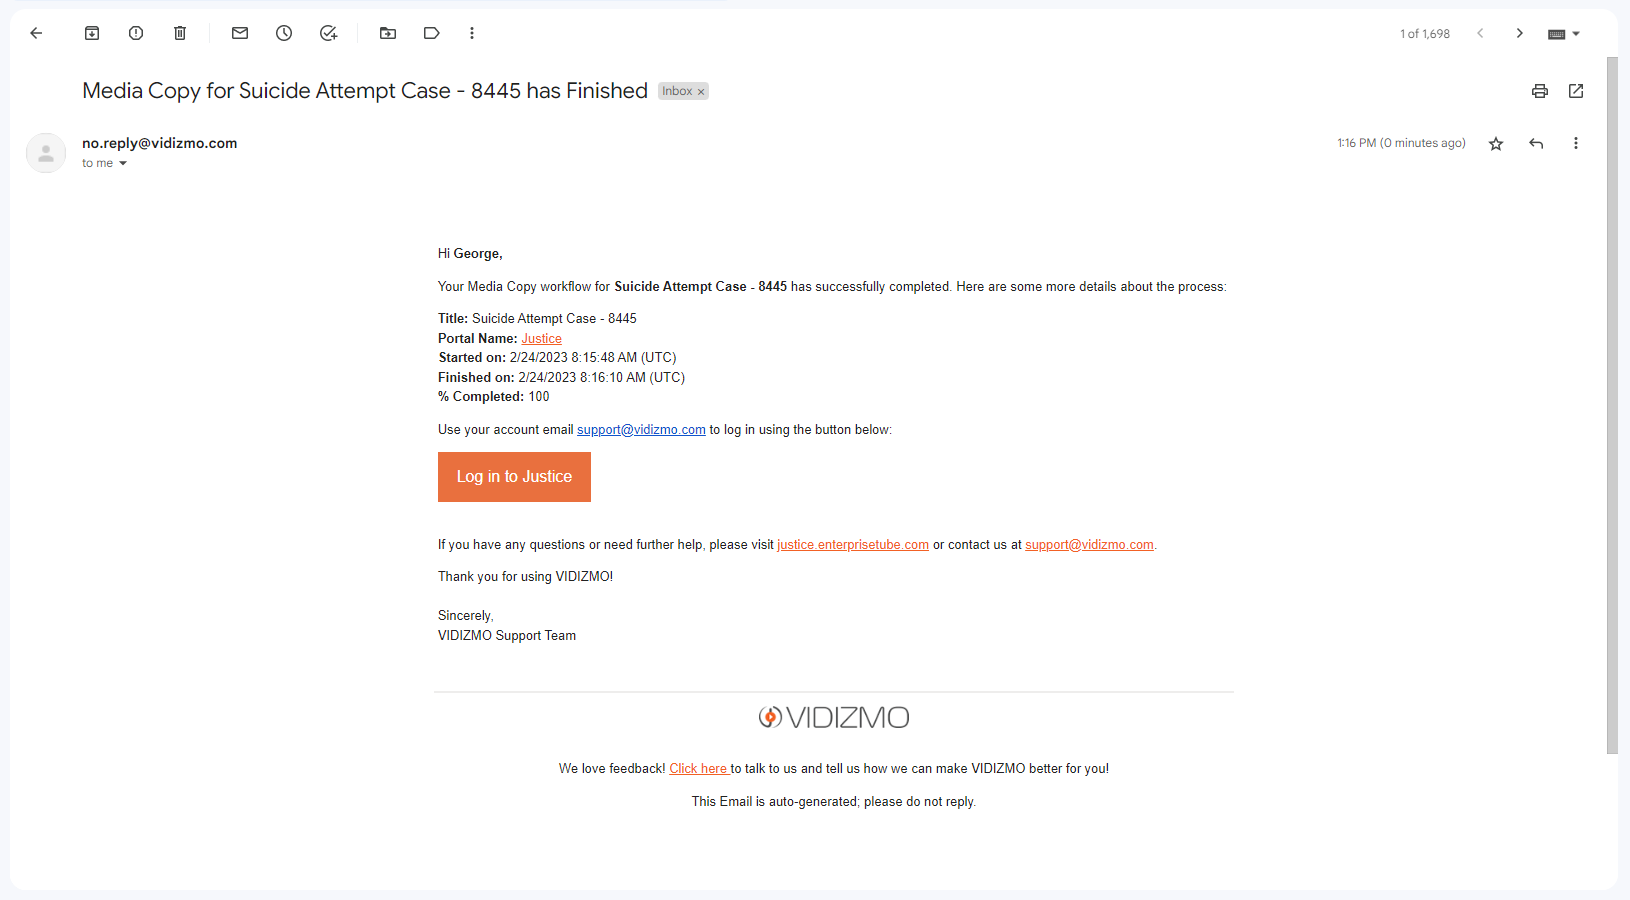
- Select the portal where you copied the video and navigate to its Evidence Library or specified location.
- The copied evidence or folder will now be available in the Evidence Library or specified location.